Introduction to Classic Apple Crisp Recipe
Autumn has this magical way of transforming our senses, doesn’t it? The beauty of the leaves changing colors, the crispness in the air, and the delightful fragrances wafting from kitchens everywhere. One dish that beautifully encapsulates the spirit of fall is the classic apple crisp recipe. This warm, comforting dessert has been passed down through generations and is a staple in many households as the weather cools down.
Why Apple Crisp is a Fall Favorite
So, what makes apple crisp such a beloved seasonal treat? For many, it’s the nostalgia of family gatherings, where the kitchen is filled with laughter and the sweet aroma of baking apples. You can easily hop onto The Spruce Eats to see just how versatile this dish can be.
Here are a few reasons why people can’t resist:
-
Simple Ingredients: The beauty of a classic apple crisp lies in its simplicity. Using everyday ingredients like oats, flour, and fresh apples, you can whip up this dessert without a complicated recipe.
-
Customizable: You can experiment with different varieties of apples, spices like cinnamon or nutmeg, and even add nuts for extra crunch. Want to make it vegan? Swap out butter for coconut oil!
-
Warm and Cozy: There’s nothing quite like enjoying a piping hot spoonful of apple crisp on a chilly fall evening. Serve it with a scoop of vanilla ice cream, and you’re in for a treat that’s hard to beat.
-
Healthy Twist: When made with wholesome ingredients, apple crisp can be a healthier dessert option compared to many others. Apples are rich in fiber, vitamins, and antioxidants, making this dish not only comforting but also nutritious.
Perfect for dinner parties or a cozy night in, this classic apple crisp recipe will soon become a go-to in your fall repertoire. Whether it’s the sweet-tart flavor of the apples or the crunchy topping that draws you in, there’s something undeniably satisfying about digging into a warm bowl of apple crisp. Ready to learn how to make it? Let’s dive into the recipe!
Ingredients for Classic Apple Crisp
Creating a scrumptious classic apple crisp recipe starts with the right ingredients. Let’s break it down into two essential categories: the filling and the topping.
Essential ingredients for the filling
For the filling, you want to start with:
- Apples: About 6 cups of fresh, tart apples like Granny Smith or Honeycrisp work wonderfully. They give a nice balance of sweetness and acidity.
- Sugar: A half cup of granulated sugar enhances the natural sweetness of the apples.
- Cinnamon: Just a teaspoon will elevate the flavor, bringing warmth to your crisp.
- Lemon juice: A tablespoon of fresh lemon juice will add brightness and help prevent the apples from browning.
For a deeper dive into the different varieties of apples and their flavors, check out this insightful article from the USDA.
Must-have items for the topping
Now, let’s talk about the delicious topping that makes this crisp irresistible:
- Old-fashioned oats: Using a cup adds that delightful chewy texture.
- Brown sugar: A half cup will give your topping a rich, caramel-like sweetness.
- Flour: A quarter cup of all-purpose flour helps bind everything together.
- Butter: One stick of cold, unsalted butter is key. Cut it into cubes for easy incorporation into the mix.
- Salt: A pinch balances the sweetness perfectly.
With these ingredients in hand, you’re well on your way to making a delightful classic apple crisp. Remember, the joy of baking is in the little details, so don’t hesitate to experiment!
Step-by-step Preparation for Classic Apple Crisp
If you’re dreaming of a warm dessert that feels like a hug on a chilly evening, then you’ll love this classic apple crisp recipe. It’s not just about satisfying your sweet tooth; it’s also about creating memories as you gather in the kitchen. Let’s dive into the preparation steps!
Prepping the apples
First things first: you’ll want to choose your apples wisely. Classic choices include Granny Smith, Honeycrisp, or Fuji for their perfect balance of tartness and sweetness. Aim for about 6-8 medium apples—that should fill your baking dish nicely.
- Wash your apples thoroughly to remove any residue.
- Next, peel them. Yes, the peeling is crucial for that tender texture.
- Then, slice the apples into thin, even pieces. This ensures they cook properly and meld together nicely in the oven. A quick tip: if you’re worried about browning, toss the slices in a little lemon juice to preserve their color and freshness.
After slicing, set them aside and bask in the delicious aroma of your hard work. You can learn more about the best varieties for baking from sources like the U.S. Apple Association, which shares great information on varieties and their uses.
Combining the filling ingredients
Now it’s time to elevate those apple slices. Here’s what you need for your filling:
- 1 cup of granulated sugar
- 2 teaspoons of ground cinnamon
- 1 tablespoon of all-purpose flour
In a large bowl, combine your sliced apples with the sugar, cinnamon, and flour. Mix gently until all the apple slices are coated. The sugar will draw out juices, creating a gooey, delightful filling that’s oh-so-satisfying. But how do you know when you’ve nailed the right blend? A quick taste can help!
Consider adding a squeeze of lemon juice or a pinch of nutmeg for that extra zing. A great apple crisp balances sweetness with a hint of tartness, making your taste buds dance!
Creating the crispy topping
What makes the classic apple crisp stand out is its glorious topping. Here’s how you can whip it up:
- 1 cup of rolled oats
- ½ cup of brown sugar
- ½ cup of all-purpose flour
- ½ cup of melted butter (unsalted works best)
- ½ teaspoon of salt
- 1 teaspoon of vanilla extract
In a separate bowl, combine oats, brown sugar, flour, and salt. Next, pour in the melted butter and vanilla extract. Mix until it’s crumbly and resembles wet sand. This uneven texture will give your topping that perfect crunchy finish!
Spread the topping generously over your apple mixture, making sure you cover as much as you can—no one wants a naked apple!
Baking to perfection
Preheat your oven to 350°F (175°C) and grab your favorite baking dish. It’s time to bake! Pour the apple filling into the dish and let that delicious topping cascade over it.
Place the dish in the oven for about 40-45 minutes. You’re looking for a golden-brown topping and bubbly juices peeking through. That’s when you know it’s that “just right” stage! If you notice the top browning too quickly, cover it loosely with foil to prevent burning while the apples finish cooking.
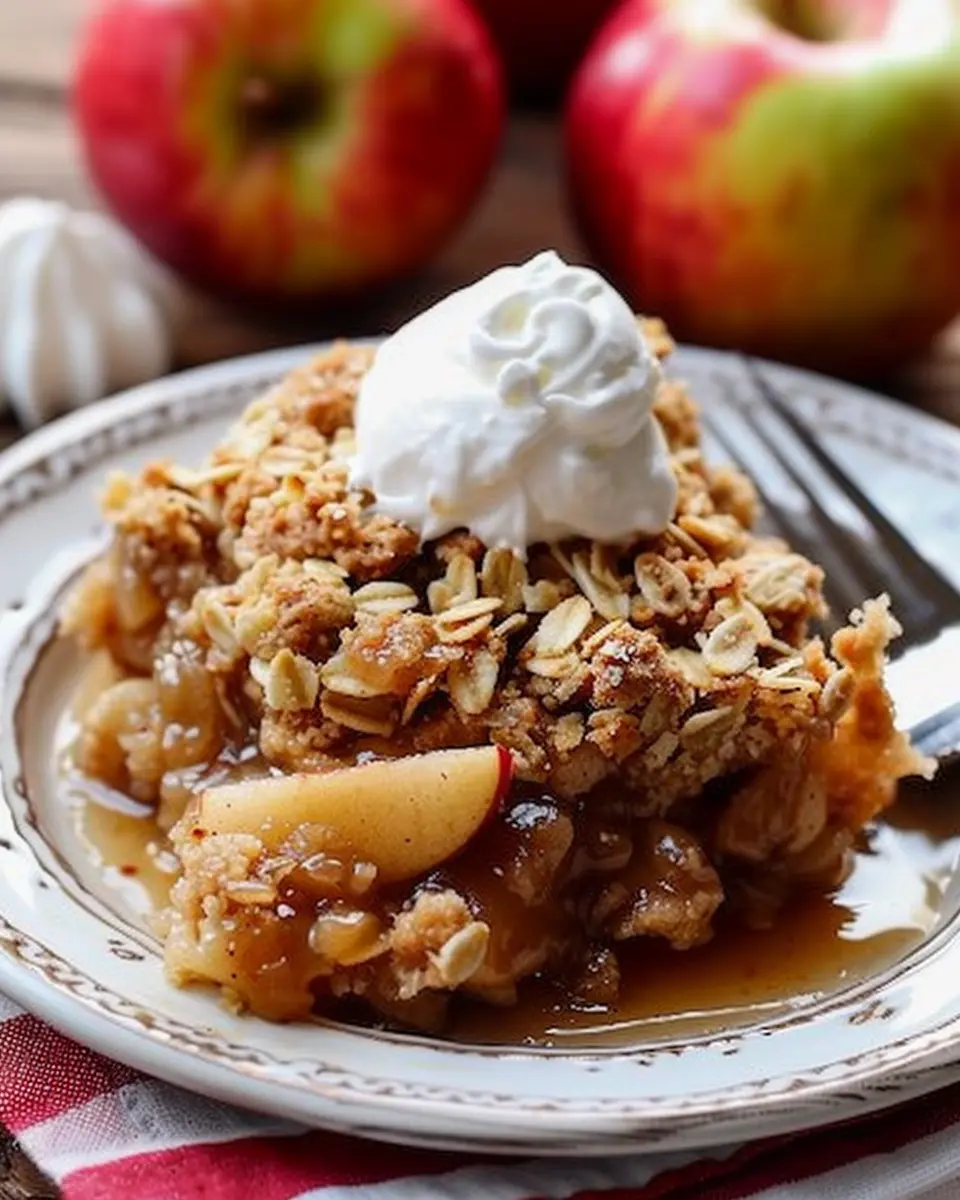
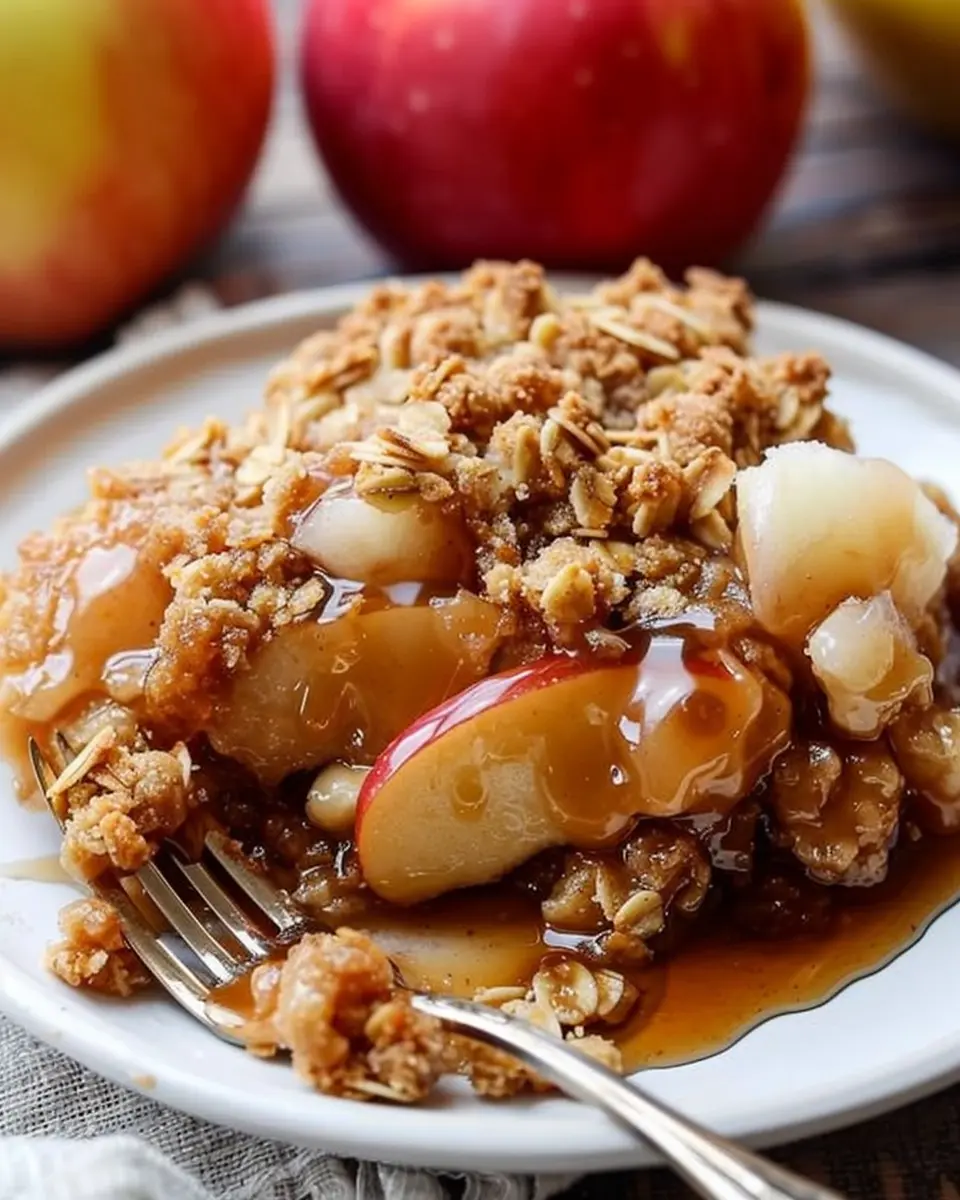
Cooling and serving
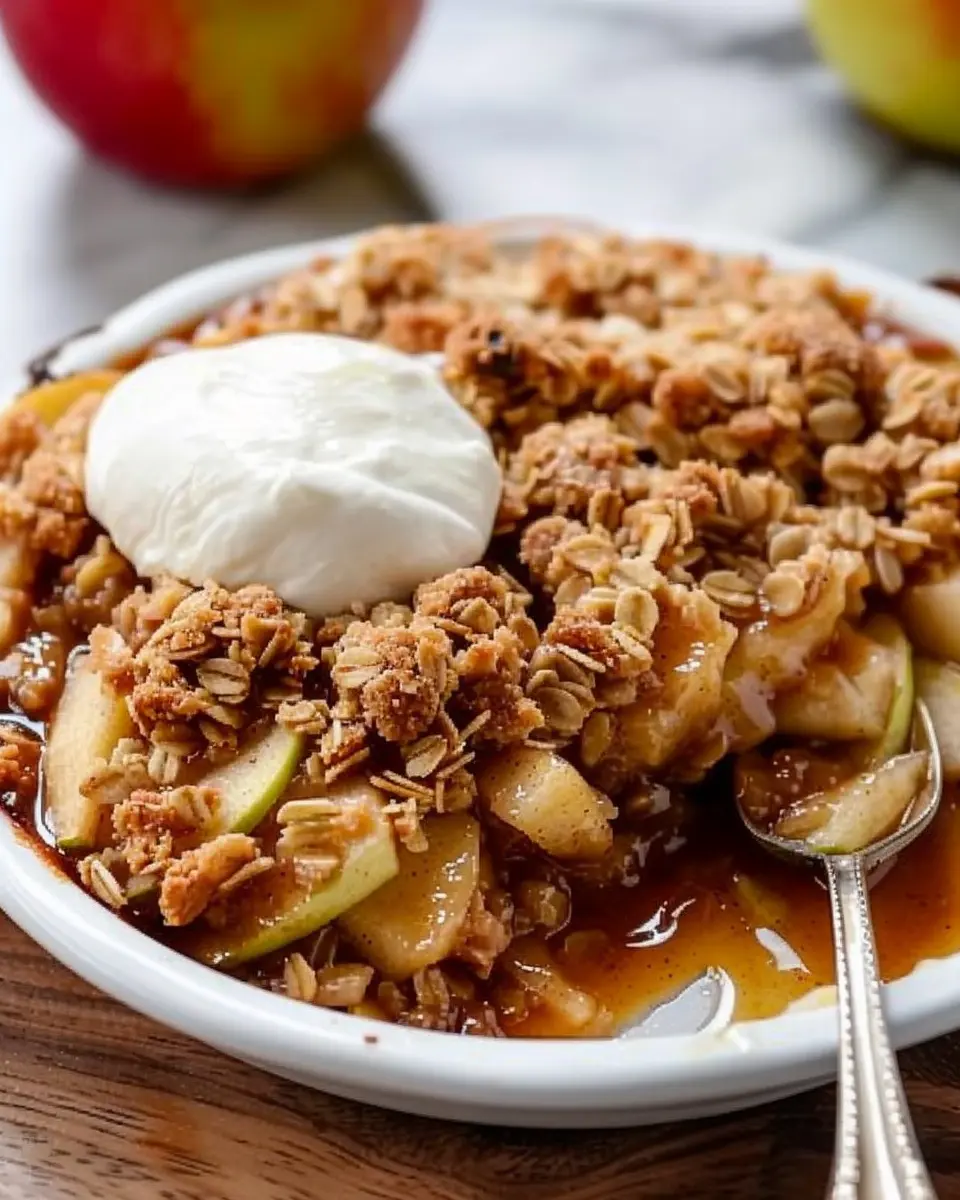
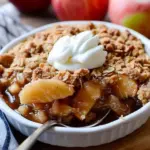
Once out of the oven, let your apple crisp cool for about 10-15 minutes. This short wait ensures the juices settle, making it easier to serve. Pair it with a scoop of vanilla ice cream or a dollop of whipped cream for a classic twist—because who doesn’t love that mix of warm and cold?
And there you have it, folks! Enjoy your homemade classic apple crisp, perfect for cozy gatherings or winding down after a long day. If you want to explore more delicious recipes, check out sites like FoodNetwork for inspiration. Happy baking!
Variations of Classic Apple Crisp
Adding nuts for a crunchy twist
One delightful way to elevate your classic apple crisp recipe is by incorporating nuts. Not only do they add an extra crunch, but they also introduce a rich flavor. Think about tossing in chopped walnuts, pecans, or almonds into your topping mix. This variation not only enhances the texture but also boosts the nutritional value by providing healthy fats and protein. You can even toast the nuts beforehand to deepen their flavor. Have you considered trying different nut combinations? It’s all about what tantalizes your taste buds!
Experimenting with different fruits
While apples are the star of a traditional apple crisp, feel free to get creative! Mixing in fruits like pears, berries, or even peaches can provide a refreshing twist. For instance, a berry-apple combo brings a beautiful color and tangy flavor, making your dessert visually stunning as well as delicious. Want to explore seasonal fruits? In the fall, add in some cranberries for a tart kick! Check out this guide on seasonal fruits to keep your crisp in harmony with nature.
Making it gluten-free
For those following a gluten-free lifestyle, adapting your classic apple crisp recipe is simpler than you think. Substitute regular flour with almond flour, oat flour, or gluten-free all-purpose flour. These alternatives not only maintain the crispy texture but can add unique flavors and nutrients. For oats, ensure they are specifically labeled gluten-free, as cross-contamination can occur. Additionally, tweaking your sweetener can also enhance the overall taste profile; consider using maple syrup or coconut sugar for a delightful change!
These variations will keep your apple crisp exciting and full of flavor, ensuring it becomes a beloved staple in your dessert rotation. Happy baking!
Cooking Tips and Notes for Classic Apple Crisp
Best practices for selecting apples
When it comes to your classic apple crisp recipe, choosing the right apples is crucial. Opt for a mix of tart and sweet varieties for depth of flavor. Granny Smith apples bring the tartness, while Fuji or Honeycrisp add sweetness and crunch. A great resource for apple varieties is the USDA’s Apples Guide for insights on seasonal selections. Don’t forget to check for firmness and freshness—yummy, crisp apples are key to that delightful texture.
Tips on achieving the perfect crisp topping
To create that irresistibly crunchy topping, remember these tips: First, use old-fashioned rolled oats because they provide that hearty texture. Combine them with a mix of brown sugar, flour, and melted butter to get a rich flavor. For an added twist, sprinkle in a dash of cinnamon or nutmeg. You’ll want to aim for a crumbly, coarse texture; if it’s too fine, you won’t get that satisfying crunch we all love in a classic apple crisp recipe.
Following these simple guidelines will elevate your apple crisp game to delicious new heights!
Serving Suggestions for Classic Apple Crisp
Pairing with Ice Cream and Caramel
The beauty of a classic apple crisp recipe lies in its versatility, especially when it comes to serving options. Imagine a warm, bubbling serving of apple crisp topped with a generous scoop of creamy vanilla ice cream. The blend of hot and cold is simply irresistible. For an extra indulgent touch, drizzle homemade or store-bought caramel sauce over the top. Not only does it add sweetness, but the gooey texture complements the crisp perfectly.
Ideal Occasions for Serving Apple Crisp
So, when should you whip up this delightful dessert? Here are a few ideas:
- Fall Gatherings: Nothing says autumn quite like the scent of baked apples and cinnamon filling your home.
- Family Dinners: This dish is always a crowd-pleaser, perfect for family get-togethers.
- Casual Get-Togethers: Whether hosting friends or enjoying a cozy night in, apple crisp is the right choice to share.
With its warm flavors and inviting aroma, your classic apple crisp will surely become the star of any occasion! If you’re looking for more dessert ideas, check out Food Network for some inspiration.
Time Breakdown for Classic Apple Crisp
Preparation Time
Getting ready to make your classic apple crisp recipe doesn’t take long at all! You’ll need about 15 minutes to peel and slice those juicy apples and mix up the delicious topping. This is your chance to unlock flavors by adding spices like cinnamon and nutmeg—don’t rush through it!
Cooking Time
Once everything is prepped and layered in your baking dish, it’s time to let the oven work its magic. Bake your apple crisp for about 30-35 minutes at 350°F (175°C). Keep an eye on it; you’ll want that perfect golden-brown topping that makes it so irresistible.
Total Time
In total, you’re looking at around 45-50 minutes from start to finish for your classic apple crisp recipe. It’s a quick yet rewarding dessert that’s perfect for a weeknight treat or a weekend gathering. Trust me, the aroma wafting through your kitchen will have everyone asking when they can dig in!
For more tips on preparing a scrumptious apple crisp, check out this Guide to Perfecting Fruit Desserts. Plus, if you’re curious about more apple-based delights, you might enjoy exploring the Health Benefits of Apples.
Nutritional Facts for Classic Apple Crisp
Calories per serving
When indulging in this classic apple crisp recipe, you’ll find it to be a comforting yet moderate choice. Each serving typically contains around 180-230 calories, depending on serving size and specific ingredients used. This makes it a delightful treat that won’t compromise your daily caloric goals!
Sugars and fats breakdown
This beloved dessert strikes a balance when it comes to sugars and fats.
-
Sugars: Expect about 10-15 grams of sugar per serving, primarily from the natural sweetness of apples and a touch of brown sugar. This means you can satisfy your sweet tooth without overwhelming your system.
-
Fats: The fat content usually ranges from 5-8 grams, mainly derived from butter in the topping. For a lighter option, consider using a healthier butter like coconut oil or even a butter alternative.
Are you curious about how to tweak the recipe for even better nutrition? Check out sources like the Academy of Nutrition and Dietetics for tips on making smart ingredient swaps without losing flavor. Remember, enjoying your favorite desserts doesn’t mean straying from a healthy lifestyle!
FAQs about Classic Apple Crisp Recipe
Can I make apple crisp ahead of time?
Absolutely! One of the great things about this classic apple crisp recipe is that you can prepare it ahead of time. To do this, assemble all the ingredients—sliced apples, sugar, cinnamon, and the crisp topping—and store them separately in the refrigerator for up to 24 hours. When you’re ready to bake, simply combine everything in your baking dish and pop it in the oven. For an even more convenient option, you can prepare the entire dish and freeze it. Just remember to cover it tightly with plastic wrap or aluminum foil. When you’re ready to enjoy it, bake it from frozen, adding a little extra time for browning.
What are the best apples for baking?
When it comes to choosing the right apples for your apple crisp, you’ll want a variety that holds its shape during baking while providing a delightful balance of tartness and sweetness. Some top picks include:
- Granny Smith: Known for their tart flavor, they create a great contrast with the sweet topping.
- Honeycrisp: These apples are both sweet and crisp, making them a fan favorite for baking.
- Braeburn: With their slightly spicy flavor, they add a unique twist to your dish.
If you’re unsure, a blend of different apples can create a more complex flavor profile!
Can I customize the sweetness level?
Definitely! This classic apple crisp recipe is super flexible when it comes to sweetness. You can adjust the amount of sugar in both the apple layer and the topping according to your taste. If you prefer a less sweet dessert, try using less sugar, or consider natural sweeteners like honey or maple syrup. Just keep in mind that sweeteners have different levels of sweetness, so it’s best to start small and adjust gradually as needed.
If you’re intrigued by making this delightful dessert, consider checking out other resources like Bon Appétit or Serious Eats for more tips on customizing your apple crisp!
Conclusion on Classic Apple Crisp Recipe
Recap of Why You’ll Love This Recipe
This classic apple crisp recipe is a true delight for your taste buds and an easy addition to your favorite desserts. With its warm, cinnamon-spiced apples and crunchy oat topping, it brings comfort and nostalgia to any occasion. You’ll appreciate how simple ingredients blend into something extraordinary—perfect for gatherings or cozy nights in.
Plus, serving it warm with a dollop of whipped cream or a scoop of vanilla ice cream elevates the experience. Trust us, your friends and family will ask for seconds! For more delicious twists on old favorites, check out Food Network and BBC Good Food.
PrintClassic Apple Crisp Recipe: The Best Comfort Dessert for Fall
Enjoy this Classic Apple Crisp Recipe, the perfect dessert for fall that combines sweet, tender apples with a crispy topping.
- Prep Time: 20 minutes
- Cook Time: 50 minutes
- Total Time: 1 hour 10 minutes
- Yield: 8 servings 1x
- Category: Dessert
- Method: Baking
- Cuisine: American
- Diet: Vegetarian
Ingredients
- 6 cups peeled, sliced apples
- 1 cup granulated sugar
- 1 tablespoon lemon juice
- 1 teaspoon ground cinnamon
- 1 cup rolled oats
- 1 cup all-purpose flour
- 1 cup brown sugar
- 1/2 cup unsalted butter, softened
Instructions
- Preheat the oven to 350°F (175°C).
- In a large bowl, combine sliced apples, granulated sugar, lemon juice, and cinnamon. Toss to coat.
- Spread the apple mixture in a greased baking dish.
- In a separate bowl, mix oats, flour, brown sugar, and softened butter until crumbly.
- Spread the oat mixture evenly over the apples.
- Bake for 45-50 minutes or until the apples are bubbly and the topping is golden brown.
- Cool slightly before serving.
Notes
- Serve with vanilla ice cream for added indulgence.
- Use a mix of tart and sweet apples for best flavor.
Nutrition
- Serving Size: 1 serving
- Calories: 300
- Sugar: 20g
- Sodium: 150mg
- Fat: 10g
- Saturated Fat: 5g
- Unsaturated Fat: 3g
- Trans Fat: 0g
- Carbohydrates: 50g
- Fiber: 5g
- Protein: 2g
- Cholesterol: 15mg
Keywords: Classic Apple Crisp Recipe, Apple Crisp, Fall Dessert