Introduction to No Dye Red Velvet Cake
Why Go Dye-Free?
When it comes to baking, many of us seek a balance between creativity and health. That’s why opting for a no dye red velvet cake can be a delightful choice. Traditional red velvet cakes often rely on vibrant food dyes that not everyone is comfortable with, particularly if you’re aiming for a more natural approach to desserts. Choosing to create your cake without artificial coloring not only makes it a healthier option but also allows the rich, velvety flavors to shine through without distraction.
By incorporating natural ingredients like cocoa powder and beet juice, you can achieve that beautiful hue while keeping your cake free from artificial additives. Want to dig deeper into the benefits of natural coloring? You may find insights from sources like the American Institute for Cancer Research.
The Allure of Red Velvet
Red velvet isn’t just any cake; it has an enchanting history that sparks curiosity. Originating in the United States in the early 20th century, it was initially known for its sophisticated color and delicately tangy flavor. The gentle hints of cocoa and buttermilk balance perfectly with cream cheese frosting, making it an irresistible treat for any occasion. Imagine serving a slice of this stunning cake at your next gathering — it’s sure to impress and ignite conversation!
The vibrant red hue often mystifies people, leading many to ask, “What makes it so red?” In our no dye version, the natural transformation inspired by simple ingredients does all the talking, proving that you can have your cake and enjoy it too — with an authentic twist.
A Personal Journey to Homemade Desserts
My journey into baking began in my own kitchen, experimenting with recipes that fit my evolving lifestyle. One day, I decided to recreate a classic dessert I had enjoyed as a child — red velvet cake. However, I sought a more wholesome approach that was free from artificial colors. After several trials and adjustments, I finally perfected my no dye red velvet cake recipe.
Baking has become more than just a hobby; it’s a way to channel my creativity and share joy with friends and family. Have you ever thought about what makes dessert taste even better? For many, it’s the love and heart you pour into it. So, let’s embrace the beauty of homemade desserts together, one delicious bite at a time!
With that, let’s get started on creating your own deliciously vibrant no dye red velvet cake!
Ingredients for No Dye Red Velvet Cake
Creating a no dye red velvet cake is easier than you might think! With some basic ingredients, you can whip up this delightful dessert without the artificial coloring typically associated with traditional recipes. Let’s break down what you’ll need to get started.
Essential Ingredients
- All-purpose flour: This will be the base of your cake, giving it a fluffy texture.
- Granulated sugar: Sweetens your cake beautifully.
- Cocoa powder: Just a hint to enhance that signature chocolate flavor.
- Baking soda and baking powder: These are essential for leavening, ensuring your cake rises perfectly.
- Salt: Balances the sweetness and enhances flavor.
- Vegetable oil: Helps keep the cake moist.
- Buttermilk: For that rich creaminess; you can substitute with regular milk if needed.
- Vinegar: A little acid to react with the baking soda for fluffiness.
- Vanilla extract: Adds an aromatic touch.
- Red food alternatives: Think beet juice or pureed strawberries for your no dye red velvet cake.
Optional Add-ins
Feel free to add a personal twist to your cake! Consider the following add-ins:
- Chopped nuts: Walnuts or pecans for added crunch.
- Chocolate chips: For extra sweetness.
- Cream cheese frosting: Obviously a classic pairing with red velvet!
These ingredients create a cake filled with flavor and character. Why not check out some expert tips and recipes on BBC Good Food for a more in-depth guide to baking? Happy baking!
Preparing No Dye Red Velvet Cake
Baking a delicious no dye red velvet cake is not only rewarding but also a fantastic way to impress your friends and family. Each step is crucial, and preparing your kitchen properly sets the stage for success. Let’s walk through the essential stages to ensure your cake is moist, flavorful, and devoid of any artificial coloring.
Prepping Your Kitchen
Before diving into baking, it’s essential to create an inviting and organized workspace. Start by gathering your ingredients and tools. Having everything on hand can streamline the process and keep you focused. Here’s what you’ll need:
- All-purpose flour
- Granulated sugar
- Baking powder and baking soda
- Salt
- Vegetable oil
- Buttermilk (or a buttermilk substitute)
- Eggs
- Vanilla extract
- White vinegar
- Cocoa powder
Make sure your oven is preheated to 350°F (175°C). Also, it’s a good idea to line your cake pans with parchment paper for easy removal later. Trust me, there’s nothing more satisfying than a perfectly baked cake sliding out of the pan with ease!
Sifting Dry Ingredients
One of the most crucial steps in baking, often overlooked, is sifting your dry ingredients. Sifting flour, cocoa powder, baking soda, and baking powder not only removes any lumps but also aerates the mixture, which contributes to a lighter cake texture.
- Using a fine-mesh sieve, sift together:
- 2 cups of all-purpose flour
- 1 cup of granulated sugar
- 2 tablespoons of cocoa powder
- 1 teaspoon of baking powder
- 1 teaspoon of baking soda
- 1/2 teaspoon of salt
Then, take a moment to appreciate how beautiful the mixture looks. It’s the simple joys like this that make baking so fun!
Mixing Wet Ingredients
Now that the dry ingredients are taken care of, it’s time to focus on the wet ingredients. This is where the magic truly begins. In a separate bowl, combine your wet ingredients to create a flavorful base for your no dye red velvet cake.
- Mix the following until smooth:
- 1 cup of vegetable oil
- 1 cup of buttermilk (or substitute with milk mixed with a bit of vinegar)
- 2 large eggs
- 1 tablespoon of vanilla extract
- 1 tablespoon of white vinegar
The first whiff of this combination will get your taste buds tingling with anticipation!
Creating the Batter
With all your ingredients prepped, it’s time to bring them together to create the batter. In a large mixing bowl, add the dry mixture to the wet mixture gradually. Stir gently until just combined; be careful not to overmix.
- Remember, a few lumps are perfectly fine!
- You can also add optional add-ins like chopped pecans or walnuts for extra texture.
This batter will have a slightly reddish hue from the cocoa powder, proving that you can indeed achieve that classic red velvet look without any artificial dyes.
Baking to Perfection
Pour your prepared batter into the lined cake pans, ensuring an even layer. Pop your pans in the preheated oven and set a timer for about 25-30 minutes.
To check for doneness, insert a toothpick into the center of the cake. If it comes out clean, it’s ready to come out! Allow the cakes to cool in the pans for a few minutes before transferring them to a wire rack to cool completely. This step is vital for flavor and moisture retention.
Remember, patience is key. As the scent of your no dye red velvet cake wafts through your home, anticipation will build, making it all worthwhile!
Enjoy the process, and don’t be afraid to experiment with toppings or frostings — a cream cheese frosting pairs beautifully with this cake!
If you want more baking tips and DIY ideas, consider checking out resources like Serious Eats or King Arthur Baking. Happy baking!
Variations on No Dye Red Velvet Cake
Red Velvet Cupcakes
If you love the idea of a no dye red velvet cake but want to switch it up, why not try making red velvet cupcakes instead? These delightful little treats are perfect for parties, casual get-togethers, or even a cozy night in. Simply adapt the cake batter into a muffin tin and adjust the baking time to about 18-20 minutes.
Cupcakes offer the bonus of easy portion control—perfect for that sweet tooth craving! Top them off with a generous swirl of cream cheese frosting for that classic red velvet experience. You can even experiment with fun toppings like crushed nuts or a sprinkle of cocoa powder for added texture.
Gluten-Free Red Velvet Cake
For those with dietary restrictions, creating a gluten-free variation of the classic no dye red velvet cake is easier than you might think! Replace all-purpose flour with a gluten-free blend or almond flour. Many of these blends mimic traditional flour quite well, allowing you to still enjoy that soft, moist texture you’d expect from red velvet.
Be sure to check out Gluten-Free Flour Guide for tips on the best blends to use for baking. Add a dash of vinegar to enhance the fluffiness, and consider using coconut sugar as a healthier, less processed alternative to regular sugar.
No matter the variation you choose, whether it be cupcakes or gluten-free options, the heart of the no dye red velvet cake remains the same: a rich flavor profile and an inviting, festive hue—all without artificial colorants!
Baking Notes for No Dye Red Velvet Cake
Common Mistakes to Avoid
When making your no dye red velvet cake, it’s easy to trip up on a few key details that can make or break your dessert. One common mistake is using cocoa powder that’s unsweetened versus Dutch-processed; stick with unsweetened for the right flavor. Also, be cautious not to overmix your batter. This can lead to a dense cake instead of a fluffy masterpiece. Lastly, don’t forget to check your measurements, especially for baking soda and vinegar, as they’re vital for achieving that airy texture.
Pro Tips for Success
To guarantee a show-stopping no dye red velvet cake, consider these insider tips:
- Use buttermilk: It adds a tangy flavor that harmonizes perfectly with the cocoa.
- Room temperature ingredients: Eggs and butter should be at room temperature for better emulsification.
- Rotate your pans: During baking, rotate your cake pans halfway through to ensure even baking.
Don’t forget to check out more tips on baking techniques at The Spruce Eats! Getting the basics right is key to a delicious cake you’ll want to make again and again.
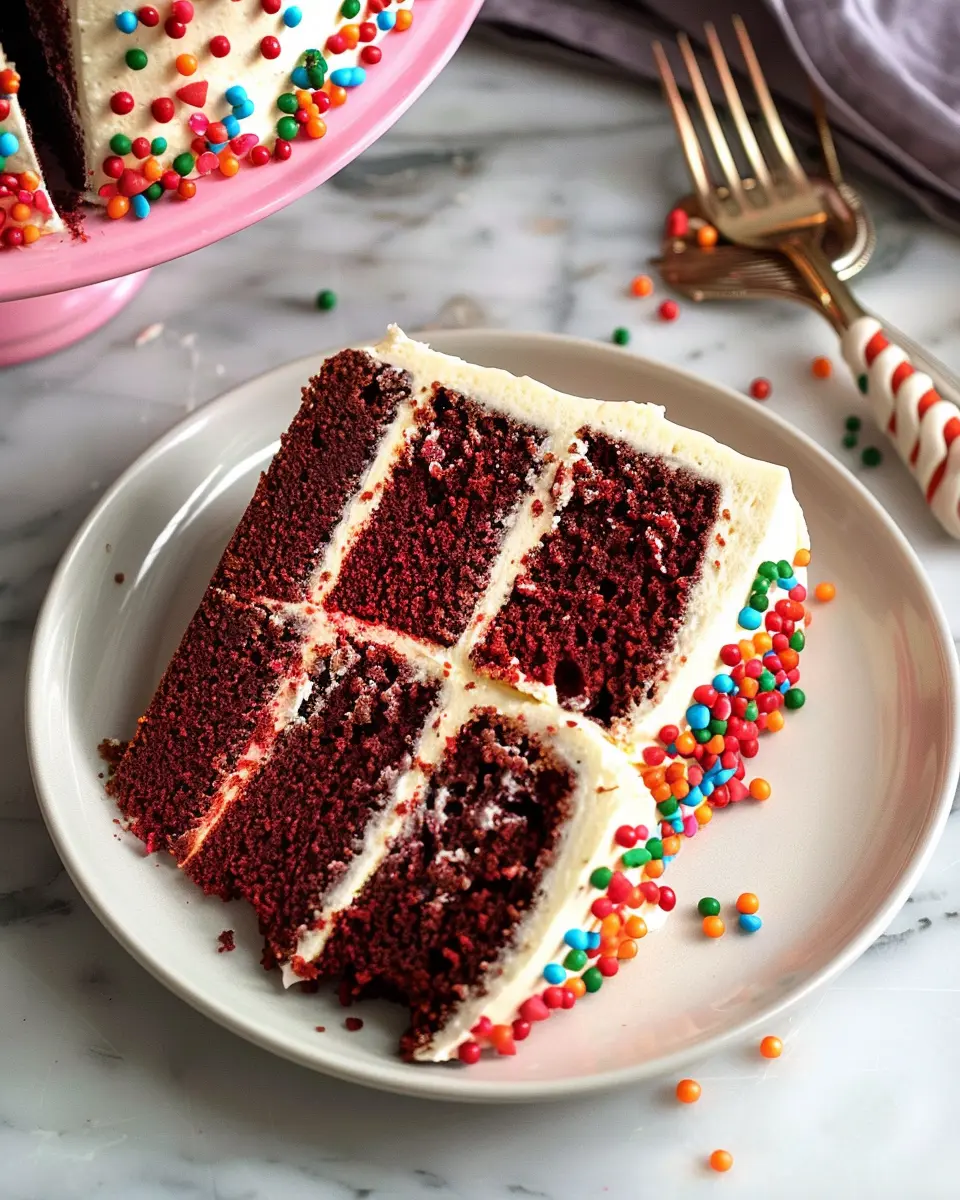
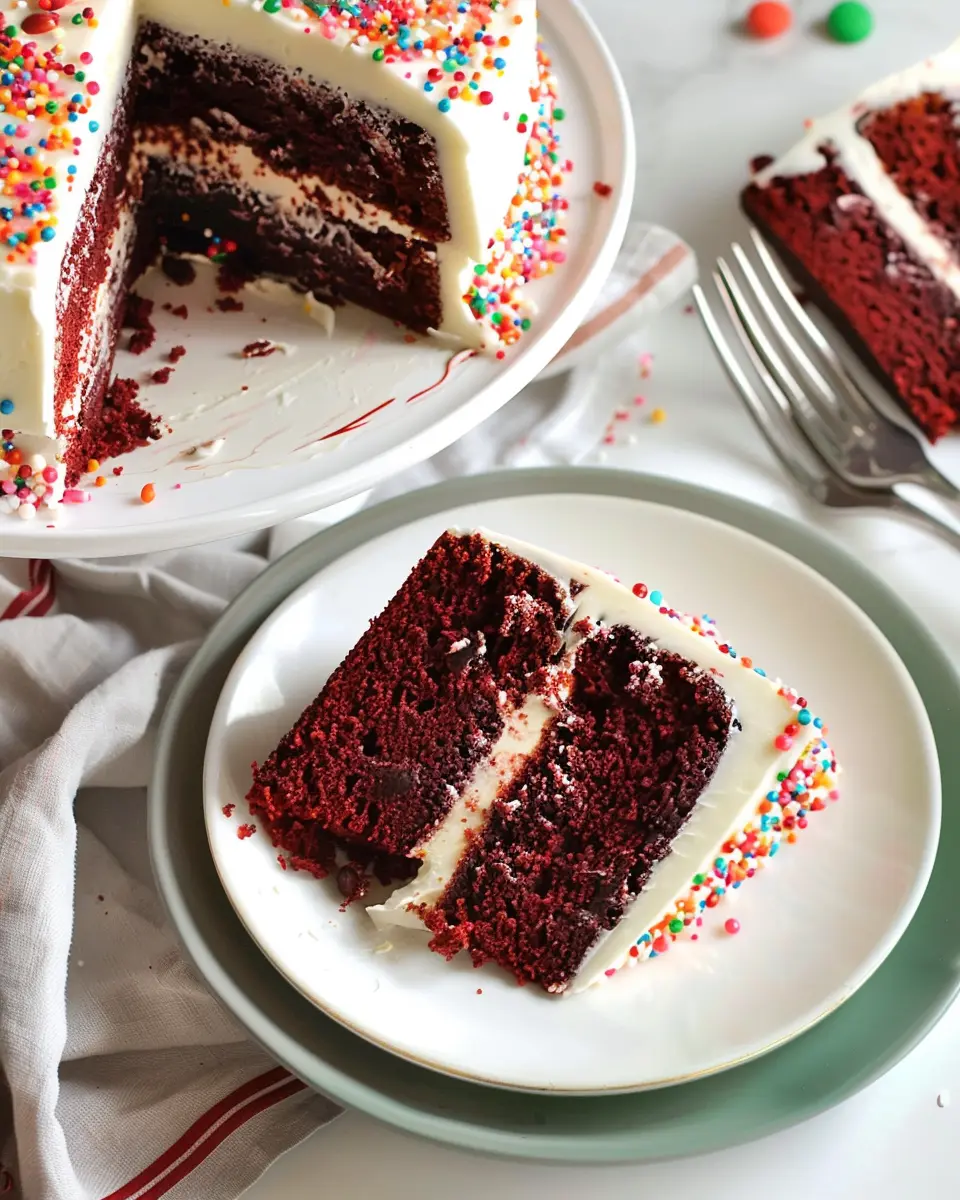
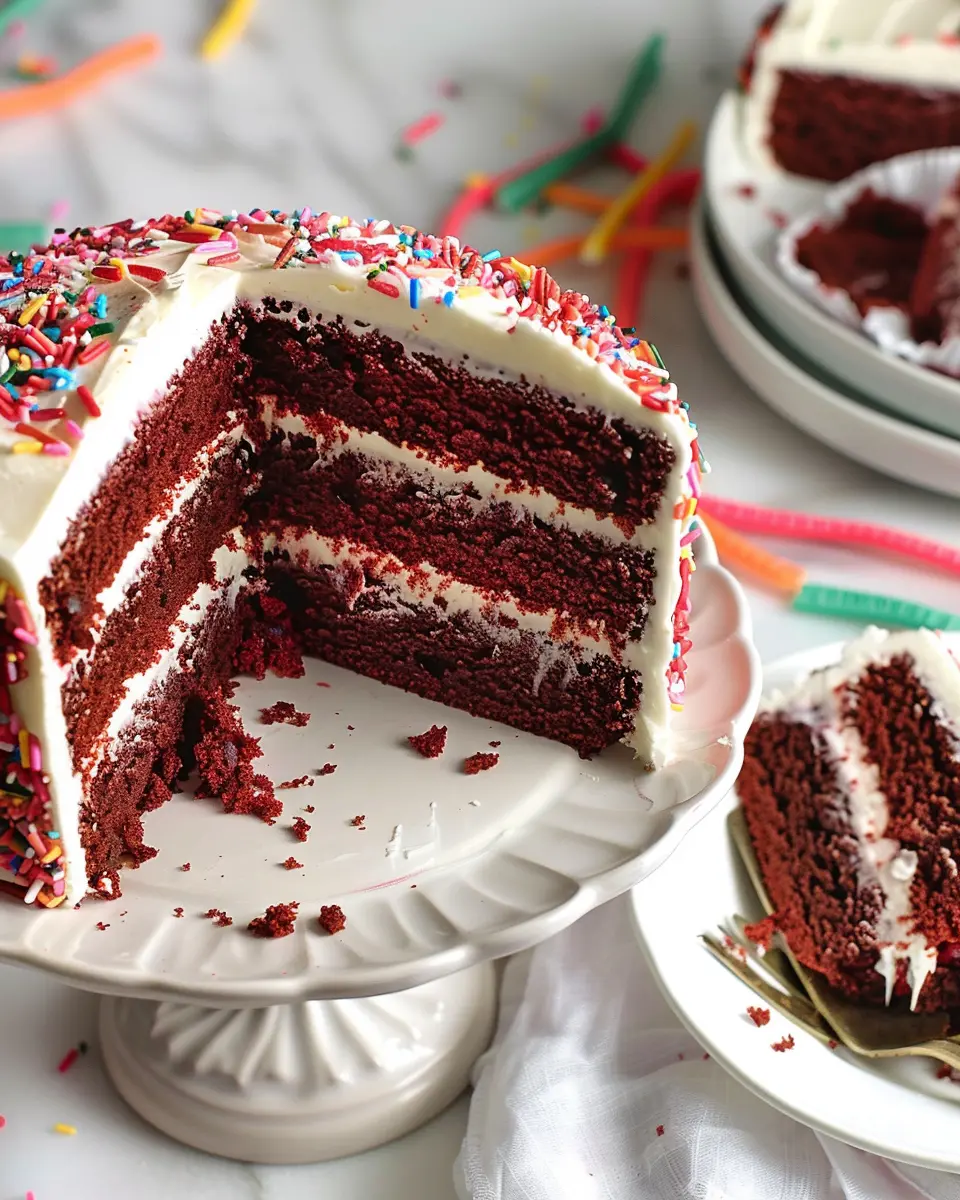
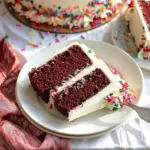
Serving Suggestions for No Dye Red Velvet Cake
Pairing with Cream Cheese Frosting
What’s a no dye red velvet cake without a luscious layer of cream cheese frosting? The tangy richness of cream cheese perfectly balances the subtle sweetness of the cake. For a delightful twist, consider infusing your frosting with lemon zest or vanilla extract. This not only enhances the flavor but also adds a touch of sophistication.
- Use a piping bag to create decorative swirls on individual slices.
- Top with crushed walnuts or pecans for added texture and crunch.
Creative Presentation Ideas
Presentation is key when serving your no dye red velvet cake. Consider these simple yet effective ideas:
- Layer Contrasts: Serve the cake on a white platter to contrast the rich red hue, making it visually striking.
- Garnish Options: Fresh berries or edible flowers can add a pop of color. Try placing them on the plate or atop individual servings for a lovely touch.
- Themed Decor: If it’s a special occasion, decorate the cake to match the event theme using themed toppers or colors.
For more innovative serving tips, check out Baker’s Journal, which offers fantastic insights into cake presentation. You’ll find endless inspiration to make your no dye red velvet cake a showstopper at any gathering!
Time Breakdown for No Dye Red Velvet Cake
When it comes to whipping up a delicious no dye red velvet cake, proper time management is key to achieving that perfect bake. Here’s a simple breakdown to guide you through the process.
Preparation Time
Expect to spend about 30 minutes gathering your ingredients, mixing the batter, and getting everything ready. This includes measuring out your dry ingredients, creaming the butter, and ensuring your oven is preheated to the right temperature. If you’re new to baking, you might want to consider reading tips on baking essentials for additional help.
Baking Time
The actual baking will take approximately 25–30 minutes. Keep an eye on your cake to ensure it’s perfectly cooked but not overdone. This is where a toothpick test comes in handy; you want it to come out clean!
Total Time
In total, you’re looking at about 1 hour from start to finish. This means, in less than an hour, you can have a delightful no dye red velvet cake ready to impress your friends or family!
Don’t forget, the joy of baking is in the process. Enjoy yourself, and don’t hesitate to ask questions or look for inspiration on popular baking forums if you hit a snag. Happy baking!
Nutritional Facts for No Dye Red Velvet Cake
Calories and Macronutrients
When indulging in a slice of no dye red velvet cake, understanding its nutritional profile can help you savor each bite. Typically, a single slice contains approximately 300 calories. It offers about:
- Carbohydrates: 40g
- Proteins: 3g
- Fats: 14g
These numbers can vary based on your specific ingredients and portion sizes, so keep that in mind when you slice into your cake!
Important Vitamins and Minerals
What makes the no dye red velvet cake even more delightful is its nutritional benefits. With its rich cocoa and buttermilk, this treat can provide:
- Calcium: Essential for bone health
- Iron: Vital for energy production
- Vitamin A: Great for skin health
While this cake might not be a superfood, enjoying it in moderation ensures you appreciate both the flavor and nutritional benefits. For more health insights, you can check out detailed resources from Healthline or Mayo Clinic.
So, next time you enjoy this beautiful dessert, remember you’re not just indulging; you’re also sharing in its rich nutritional offerings!
FAQs about No Dye Red Velvet Cake
Can I use cocoa powder substitutes?
Absolutely! If you’re aiming for a no dye red velvet cake, you might consider substitutes like carob powder or even Dutch-processed cocoa. Keep in mind that these options can alter the flavor slightly, so choose one that best matches your taste preferences. Carob, for instance, has a naturally sweet and earthy flavor. However, stick with unsweetened varieties to maintain that rich chocolate base integral to traditional red velvet.
How to store leftovers?
Storing your no dye red velvet cake properly ensures it stays fresh and delicious. Here are some essential tips:
- Refrigeration: If you have leftovers, slice the cake and wrap each piece tightly with plastic wrap, then store it in an airtight container. This method keeps the cake moist and helps to preserve flavors.
- Freezing: For longer storage, freeze uncut cake or individual slices. Just remember to thaw it in the refrigerator overnight before serving.
What’s the best way to frost a cake?
Frosting can make or break your no dye red velvet cake. For an easy approach:
- Ensure your cake is completely cooled before frosting. This prevents melting.
- Use a crumb coat: Apply a thin layer of frosting first to seal in crumbs, then refrigerate for about 30 minutes.
- Finish with a thicker layer of frosting using an offset spatula for smooth application. The key is to work from the top down and use gentle pressure to spread.
Don’t hesitate to add your favorite cream cheese frosting recipe for that classic red velvet flavor! Check out this cream cheese frosting guide for more tips.
Baking can sometimes feel daunting, but with these simple FAQs, you’ll be armed with the knowledge to create a beautiful, delicious no dye red velvet cake that everyone will love. Happy baking!
Conclusion on No Dye Red Velvet Cake
Embracing Homemade Happiness
Baking a no dye red velvet cake is not just about the deliciousness but also the joy it brings to your home. The vibrant, natural hues can brighten any occasion, and knowing you’ve skipped artificial additives makes it even more satisfying. Remember, every slice is a testament to your effort and creativity. Sharing this cake with loved ones creates lasting memories that store-bought options simply can’t compete with.
Final Thoughts on Baking with Love
As you venture into baking your no dye red velvet cake, think of it as an expression of love. Each ingredient, whisk, and layer brings a sense of home to your table. Whether it’s for a birthday or just a cozy weekend, embracing the joy of homemade desserts will always yield sweet rewards. So gather your ingredients and let the baking begin! For more inspired recipes, check out resources like King Arthur Baking or Food Network.
Happy baking!
PrintNo Dye Red Velvet Cake: A Delightfully Indulgent Treat for Everyone
A rich and decadent dessert that is perfect for special occasions without the use of artificial dyes.
- Prep Time: 20 minutes
- Cook Time: 30 minutes
- Total Time: 50 minutes
- Yield: 12 servings 1x
- Category: Dessert
- Method: Baking
- Cuisine: American
- Diet: Vegetarian
Ingredients
- 2 cups all-purpose flour
- 1 cup granulated sugar
- 1 teaspoon baking soda
- 1 teaspoon salt
- 1 cup vegetable oil
- 1 cup buttermilk
- 2 large eggs
- 2 tablespoons unsweetened cocoa powder
- 1 tablespoon vanilla extract
- 1 tablespoon white vinegar
Instructions
- Preheat your oven to 350°F (175°C).
- In a large bowl, sift together the flour, sugar, baking soda, salt, and cocoa powder.
- In another bowl, combine the oil, buttermilk, eggs, vanilla, and vinegar.
- Mix the wet ingredients into the dry ingredients until just combined.
- Pour the batter into a greased cake pan.
- Bake for 25-30 minutes or until a toothpick inserted in the center comes out clean.
- Let the cake cool before frosting.
Notes
- For a richer flavor, let the batter sit for 10 minutes before baking.
- Pair with cream cheese frosting for a classic touch.
Nutrition
- Serving Size: 1 slice
- Calories: 350
- Sugar: 20g
- Sodium: 300mg
- Fat: 18g
- Saturated Fat: 3g
- Unsaturated Fat: 15g
- Trans Fat: 0g
- Carbohydrates: 45g
- Fiber: 1g
- Protein: 5g
- Cholesterol: 40mg
Keywords: No Dye Red Velvet Cake, Red Velvet Cake, Dye-Free Dessert, Indulgent Treat